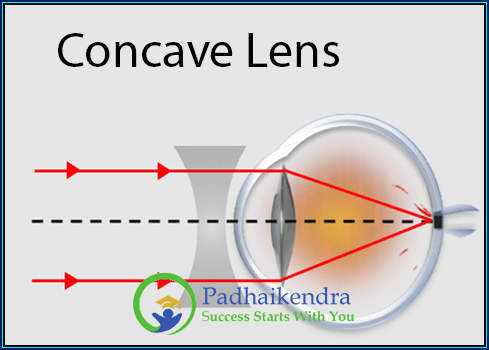
When it comes to the geometric construction of images formed by a concave lens, there are a few key steps to follow. Let’s explore the process in detail:
Start with the Lens
Draw a vertical line to represent the principal axis of the concave lens. Then, draw the shape of the lens, which is thicker at the edges and thinner in the center. The lens should be symmetrical along the principal axis.
Locate the Focal Point
For a concave lens, the focal point is on the same side as the incoming light. To find the focal point, draw two rays parallel to the principal axis. One ray should pass through the center of the lens without being refracted, while the other should pass through the focal point on the opposite side of the lens. The point where these two rays intersect marks the focal point (F) of the concave lens.
Identify the Object
Draw an arrow or an object above the principal axis to represent the object that is emitting or reflecting light.
Trace Ray 1 – Incident Ray Parallel to the Principal Axis:
Draw a ray from the top of the object parallel to the principal axis. This ray will be refracted by the concave lens. After refraction, extend the ray backward in a straight line.
Trace Ray 2 – Incident Ray Towards the Focal Point:
Draw another ray from the top of the object, this time aimed toward the focal point (F) of the lens. This ray will be refracted and travel parallel to the principal axis after passing through the lens.
Locate the Image
Locate the point where the two refracted rays intersect. This intersection point represents the top of the image formed by the concave lens. Draw the image below the principal axis, symmetrically to the object. The image formed by a concave lens is virtual, upright, and smaller in size than the object.
Complete the Image
Draw the remaining parts of the image, making sure to maintain symmetry with the principal axis. The image should be upright, virtual, and smaller in size.
Steps to Construct Image for a Concave Lens Geometrically
- Draw a straight line perpendicular to the center of the lens to represent the optical axis of the lens.
- Draw an object, represented by an arrow or other shape, on one side of the lens along the optical axis. The object should be placed at a distance greater than the focal length from the lens.
- Draw a ray of light from the top of the object parallel to the optical axis. This ray will be refracted by the lens and diverge as if coming from the focal point on the same side of the lens.
- Draw a second ray from the top of the object towards the lens and pass through the center of the lens. This ray will continue in a straight line and will not be refracted by the lens.
- Draw a third ray from the top of the object towards the lens and pass through the focal point on the opposite side of the lens. This ray will emerge from the lens parallel to the optical axis.
- Where the three rays appear to diverge on the same side of the lens, draw the corresponding point of the image. This point represents the top of the image formed by the lens.
- Repeat steps 3-6 for the bottom of the object to find the corresponding point at the bottom of the image.
- Draw a straight line between the two points representing the top and bottom of the image to complete the construction of the image.
Important Notes
- In the case of a concave lens, the image is always virtual and located on the same side as the object.
- The image formed by a concave lens is smaller in size compared to the object.
- The location and size of the image depend on the distance between the object and the lens.
By following these steps, you can construct a geometric representation of the image formed by a concave lens. This visual representation helps in understanding the properties and characteristics of the image, such as its size, orientation, and position.


